I hope this can be of use to somebody.
POSES
Don't use old freebie poses from 4+ years ago. Everyone reconises them and it cheapens your blog a lot. It just doesnt look good.
This doesn't mean you can't use freebies. There are plenty of newer ones on the marketplace that are super nice looking. There are also low budget pose stores that make high quality poses im sure anyone can afford.
To store these poses i suggest Boom Animation Station. Check it out in world to really see what you're getting. Its well worth it.
PHOTOS
When Taking a Photo You want to have the best quality possible. Remember that blogging is advertising products for designers to help other people notice it and want to buy it. You don't want to have a low quality image that makes the product look bad.
I know not everyone has some sort of super gaming pc, but really its not needed. Just follow these steps to improve your image quality.
Adjust your graphics Settings

Med settings are perfectly fine for casual everyday use just hanging out with friends and such, but for blogging you need to step it up.Ultra may be to much for some pcs to handle, so move the slider up to High and it still looks very good
Here are some samples
 |
| Example of an Image Taken on The Lowest Graphics Settings |
 | |||
| Example of an Image Taken on Medium Graphics Settings |
 | ||
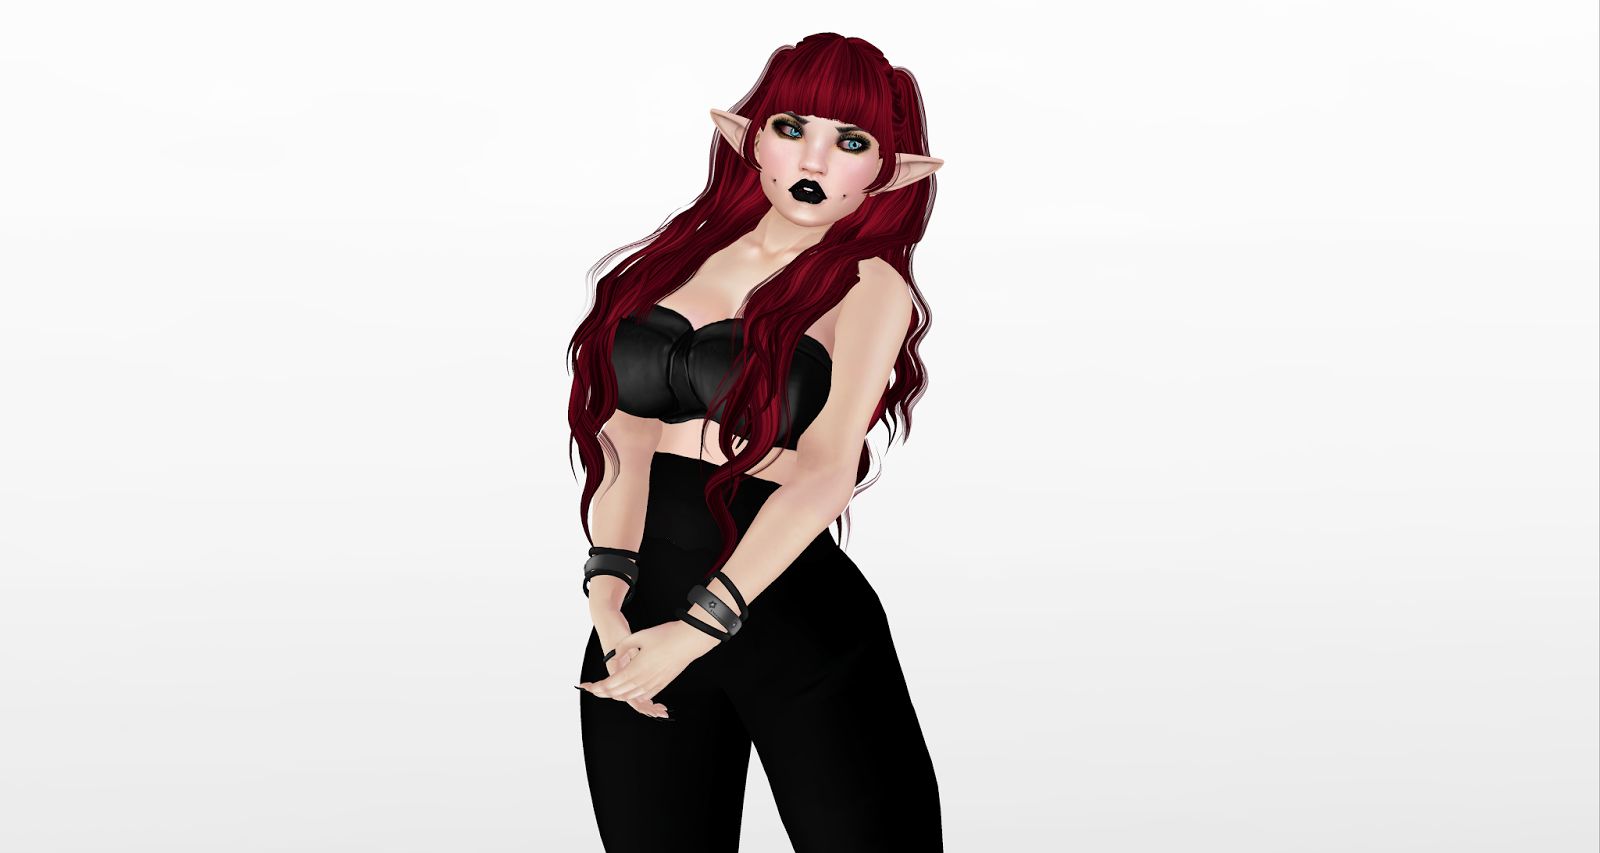
| Example of an Image Taken on High Graphics Settings |
Now click on these photos to enlarge them so you can examine each image. Notice the differences in quality on each setting.
Low and Med settings will leave your av looking a bit dull. Also you will see jagged edges and textures wont look as good.
When you turn your settings on High you will notice everything starts to smooth out.The edges of your shape and clothing, the texture of your skin looks brighter and more defined.
PERFORMANCE
When you are doing photos on high-ultra settings its totally normal to experience lagging and freezing. It happens.To lessen this do the following.
Under your graphics settings after you have turned it to High, then lower your draw distance, Max particle Count, Physics,Trees,Terrain, and Sky.
You will not need these turned up for photos that are taken in a studio type setting with a background.
However with an on location shoot you will need the higher quality settings.
TOOLBAR BUTTONS
If you have never used these or don't even know what they are I am shocked. As a blogger you should have already been using atleast a few of these.

To access these buttons you can either right click on the side of your viewer or the bottom. Just right click on the buttons and click Toolbar Buttons.

You should now be looking at this.Now locate the one that says Phototools Camera. Drag it over to the left side your your viewer screen as show in the image above this one. Now the button will be there for easy access.
I also suggest keeping the Pose Stand Button there.
PHOTOTOOLS CAMERA

When you click on the button you will see this. Dont worry its not difficult. Actually you wont even be using most of it.
The only slider you need to use is View Angle. This will allow you to zoom in super close to areas of the body to get a better shot.
To save the camera position choose the icon that looks like an eye with a downward facing arrow. This is so if you crash you wont loose your camera view you just set.
When you are finished put it back to the norm between 700-850ish. whatever it was before you started.
WINDLIGHT
If you are blogging or doing photos you should know what windlight is and how to use it otherwise you wont be getting the best lighting to showcase anything you are wearing.

At the top of your screen under World you will see Enviromental Editor, then Sky Presets, then Edit Preset.
Click on Edit Preset.

I know it looks complicated to someone who has never used it before, but it really isnt once you get the hang of how it works.

Now at the top beside the word Name: you can select from tons of lighting presets. You want to find a clear well lit light settings for your photos, unless you are doing some sort of dark theme photo and want to use something else. That will be tricky because you have to be sure a darker lighting still shows what you have on enough for people to identify it.
Notice the preset at the bottom thats highlighted. Try using that one.
BACKGROUNDS
Backgrounds can either enhance a photo or ruin it. Its very important to really think about your choice of background and if its gonna clash with your outfit.
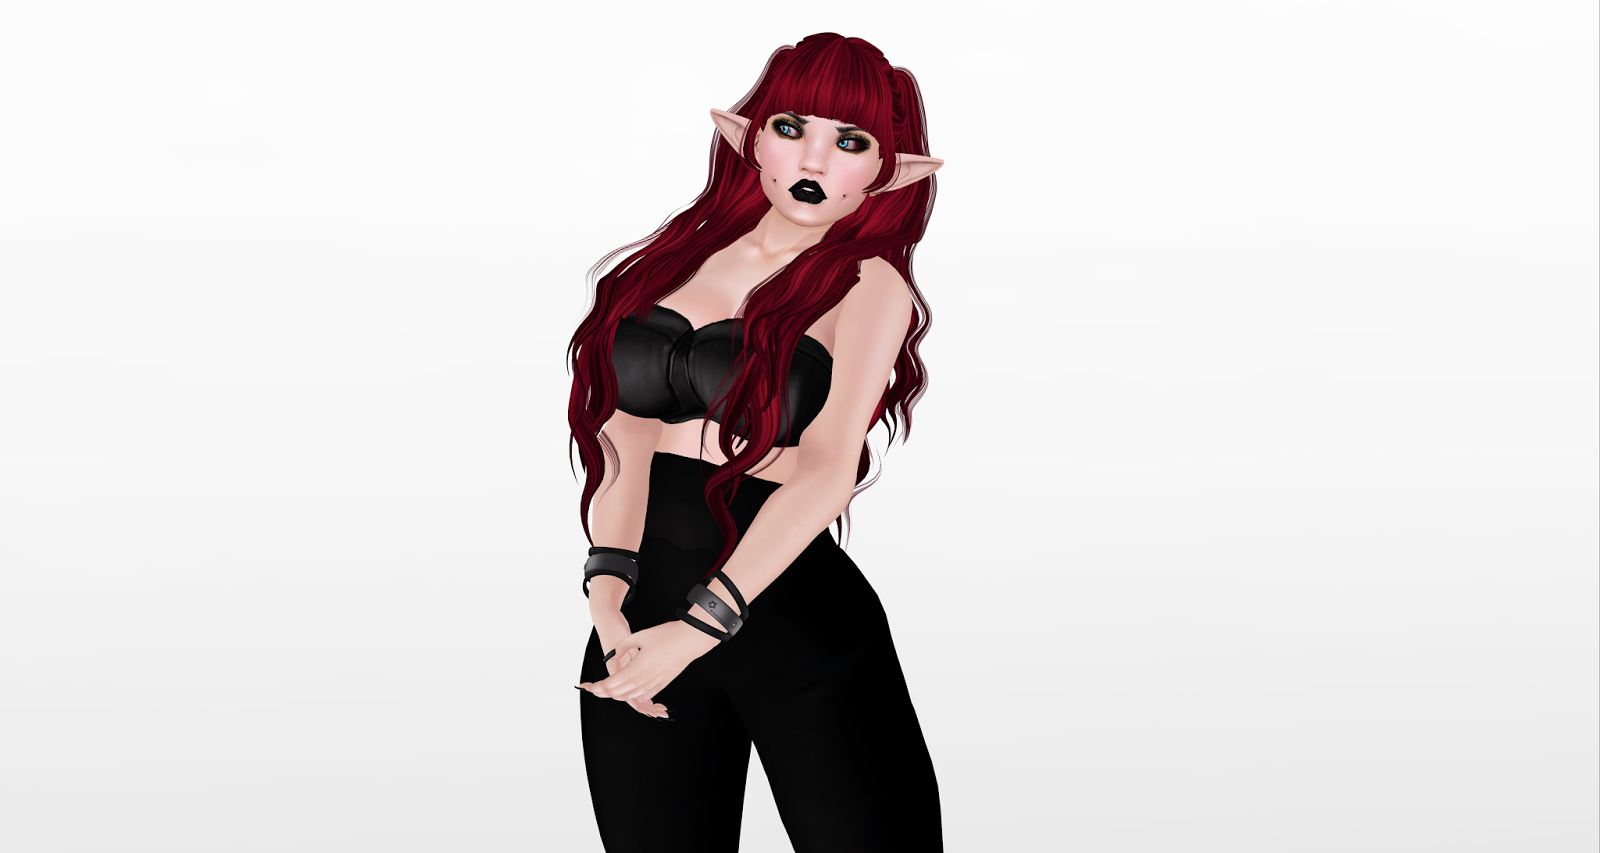
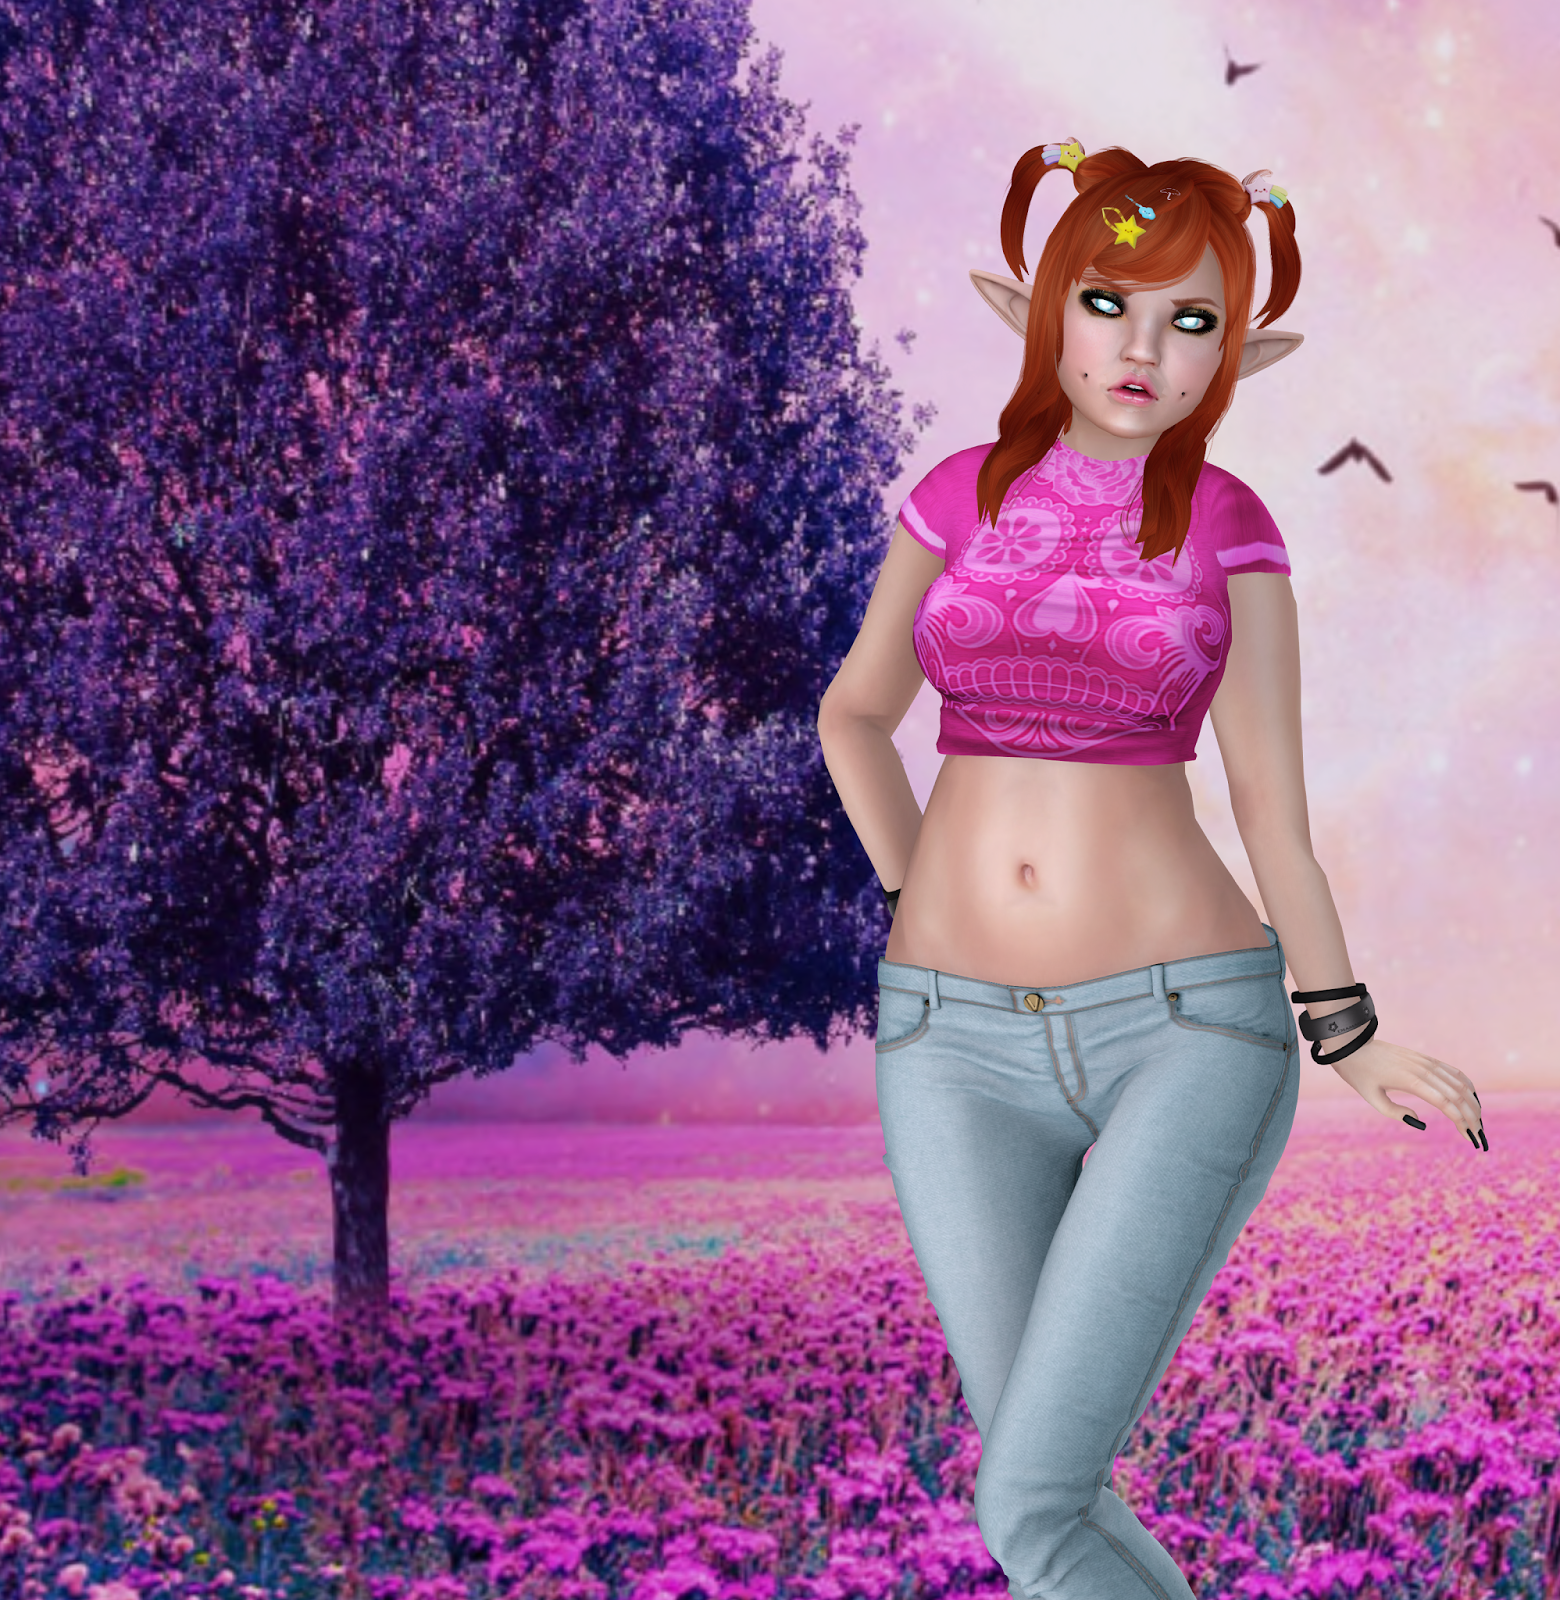 |
| Image 1 |
 | |||
| Image 2 |
Now look at image 2. The same background image, but blurred. You can still makeout the outlines but the background is no longer the focus on this blog photo. Your eyes now go to what your avatar is wearing. The colors in the background now enhance your avatar not overpower it.
If choosing to do an on location photo, meaning you are doing a photo somewhere in world that isnt in a Studio with a background image. You will have to be extra careful to be sure the scene enhances the look not overpowers it.
*note the example image 1 isnt even that busy, i just wanted to give to an example of a busy background being used with blog photos*
EFFECTS
I have seen this a lot and i know its tempting to do but you have to limit it.
Do not put thick frames on your images. It cheapens the look of what should be a high quality image.
Do not over use effects on your image such as grunge brushes and scratches. It makes the images look messy and it takes away the focus of what you are trying to blog.
Also careful with the filters. Dont throw on to many filters. Because by the time you finish the outfit wont even look like it should.Use bright and contrast to enhance. Thats really all thats needed,
If using effects choose something that will enhance such as light rays. Make it subtle.
EDITING
The only editing you need to be doing to the avatar in the photo is fixing distorted joints because of certain poses, or fixing your hair if its going through part of your boobs, or if the alpha is making a nipple show. That happens. Its not problem fixing it. But never make any major editing changes to what you are wearing. You want people to see what they are really going to see in world.
YOUR BLOG
Now this can be a matter of personal taste and diffrent opnions, but using a template with a super busy background will be more of a headache for readers than an attraction.
Go for a clean layout and color scheme. Then have someone make you a very nice custom blog header with your blog name on it to make your blog stand out.
This makes your blog look super neat and professional.

